Mostrando entradas con la etiqueta Manualidades - Crafts. Mostrar todas las entradas

12 jul 2012

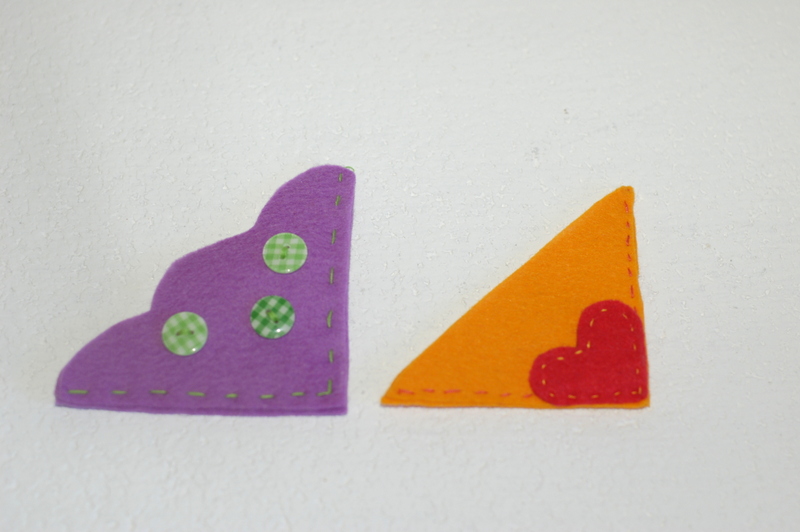
Marcapáginas de fieltro y color- colourful bookmarks


Con un retal de fieltro, hilo, aguja e imaginación podéis crear estos divertidos marcapáginas que no estropearán tus libros y que añadirán un toque de color a vuestro momento de lectura. Tan simples y tan útiles!

¡¡Feliz sonrisa!!

***

With a felt remnant, thread, a needle and a bit of imagination you can create these funny bookmarks, which would not damage your books while adding a touch of colour to your reading moments. So simple, so useful!

Happy smile!


11 ene 2012

Gatitos de peluche- Cuddly kittens

Hola a todos! Papa Noel me trajo una máquina de coser y he hecho unas cuantas cosas con ella (es fantástica). Hoy os traigo unos gatitos de peluche que hice para los más peques (Candela, Adriana y Yago). Quería algo muy especial y pensé en unas almohadas de peluche muy divertidas. Son muy faciles..solo hay que dibugar el gato, recortar, coser por el revés dejando un hueco para meter el relleno (sed generosos!) y cerrar, cosiéndolo a mano. ¿Qué os parecen?

***

Hi everyone! Santa brought me a sewing machine and I've practised a lot (I love it). Today I show you these cuddly cats for the kids (Candela, Adriana and Yago). I wanted to make something special for them, so I thought about these funny pillows. A piece of cake...we just have to draw the cat, cut it, sew it on the wrong side leaving it a bit open for stuffing, turn the cat inside out, so the right pattern is on the outside and stuff it with wadding (be generous!). Then, sew up the last open seam by turning the edges in. Do you like them?

¡¡Feliz sonrisa!!
Happy smile!

10 dic 2011

Broches dulces - Yummy brooches

Este puente he hecho muchas cosas y esta semana las iré subiendo al blog para compensar mi ausencia debido al trabajo-universidad-corregir-socorro!!!
Empiezo con lo que hice ayer en una de esas "tardes de chicas" de manualidad-risas-chocolate-música- y buen rollo que me encantan. Son unos broches-piruletas que hice con "fimo", esa masa parecida a la plastilina que luego se cuece al horno. Me apetecía mezclar, jugar con los colores y hacer distintas formas y así quedaron.
***
This long weekend I made a lot of things, which I'll show you during the week, to compensate for my absence due to the job-uni-correction-help!!!
I start with the craft I made yesterday, one of those "girly evenings" plenty of craft-laughter-chocolate-music- and good vibrations- that I love.  I made some lollipop-brooches with "fimo",  which is a clay very similar to plasticine but hardened in the oven.I felt like mixing, playing with the colours and different shapes and this is the result.


Después de hacer las piruletas y cocerlas 30 minutos al horno a 110 º, sólo tuve que barnizarlas y pegarles el palo y el broche y...voilà! ¿Quién quiere un broche-caramelo?
***
After modelling the lollipops and baking them in the oven for 30 min at a temperature of 110ºC/230º F, I glazed them and glued the stick and the brooch and...voilà! Who wants one?


¿No os entran ganas de darles un bocadito?
Don't you feel like eating them in one bite?


¡¡Feliz sonrisa!!
Happy smile!

29 sept 2011

Posavasos de tela- Fabric coasters

Seguro que tenéis un montón de retales y no sabéis qué hacer con ellos. Y si como yo, vosotros también sois de los que dejan el vaso en cualquier sitio y entonces vuestras mesas tienen algún cerco, estos posavasos os gustarán. Lo mejor es que son super fáciles de hacer y quedan muy bonitos porque podemos hacerlos de distintas formas y con diseños variados.

Sólo necesitaremos:
Retales de tela
Fieltro
Fiselina (cinta que se pega planchando encima. Ya os hablé de ella aquí)
Tijeras

***

You probably gathered a collection of scrap pieces of fabric. And if, like me, you also leave the glasses anywhere and then your table has water rings around, these coasters will be the solution. The best is that they are super easy and they look really nice on your table. You can make your coasters with different shapes.

We only need:
Fabric
Felt
Fabric adhesive tape (You only need to iron on it to bond the two pieces of fabric)
Scissors


      1. Fiselina
      2. Ponemos la fiselina entre el fieltro y la tela
      3. Cubrimos con un retal y planchamos
      4. Levantamos la tela y ya está pegado
      5. Hacemos un círculo o cuadrado o la forma que se os ocurra
      6. Recortamos

      ***
      1. Fabric adhesive tape
      2. Place the double-sided strip of adhesive between the fabric and the felt
      3. Cover it with a piece of fabric and iron
      4. Remove it and it will be ready
      5. Make the shape of your coaster, circles, squares, or any shape you want
      6. Cut the coasters


¡¡Feliz sonrisa!!

Happy smile!

30 ago 2011

Cuadros de tela - Fabric pictures


¿Qué os parecen estos cuadros de tela? ¿A qué dan un toque distinto? Mis padres tenían estos enormes marcos antiguos sin usar... hasta que llegue yo!

Son facilísimos, solo hay que elegir una tela, estirarla bien ajustándola al marco y grapar por detrás. En el salón sólo he decorado la pared con los cuadros, pero queda fenomenal mezclándolos con marcos de fotos.

¡Feliz sonrisa!


***

What do you think about these fabric pictures? Aren´t they funny and super cute? My parents had these enormous old frames with no use...until I saw them!

They are so easy to make! You only need  to accomodate the piece of fabric you like and then pull it over each corner and staple it. In the living room, I have decorated one of the walls with the pictures, but it looks really nice when combined with photos.

Happy smile!


Uno de los cuadros de árboles
***
One of the panels with trees

Aún tengo que encontrar dónde poner éste
***
I still have to find a place for this one


Detalle
***
Detail of the backside

28 ago 2011

Imánes para mi nevera - Magnets for the fridge

Me gusta mucho tener la nevera decorada con fotos, mensajes etc... Así que cuando un día vi en una tienda un paquete de imanes (la base) los compré. Estuvieron en un cajón mucho tiempo hasta que me decidí a intentar hacer unos bonitos imanes.
Compé arcilla blanca y moldeé distintas formas. Dejé secar una noche entera y al día siguiente ya podía empezar a decorar.

***
I really like having my fridge decorated with pics, notes... So when I saw a box of magnets, I bought them. They were in the drawer for some time until I felt like creating some nice magnets on my own.

I bought white clay and moulded it with different shapes. I let the clay dry for a night and the following day I could start decorating the magnets.

Material usado

Al ser tan pequeños y no muy habilidosa con el pincel, decidí coger un folio y dibujé las distintas siluetas de los imanes. Luego me puse a dibujar con mi lápiz y a colorear con mis pinturas de madera de toda la vida.
Hice una geisha y un árbol muy parecido al de Klimt. Luego no tuve más que recortar y pegar el folio en la superficie del imán (previamente pintado con tempera). Después para darle un toque naïf hice una mezcla con cola blanca y agua y pinte todo el imán.

Cuando se secó no tuve más que poner la base del imán con silicona y voilà!

¡¡Feliz sonrisa!!
***
As they were very small and I not very handy with the paintbrush, I decided to take a sheet of paper and draw with my pencil and crayons.
I made a geisha and a tree, very similar to Klimt's. Then I cut the paper with the same size of the magnets and stuck it. Then to give a naïf touch to the magnets, I mixed white glue with water and painted the clay.

When dried, glue the clay and the magnet with silicone and voilà!

Happy Smile!


LinkWithin

Related Posts Plugin for WordPress, Blogger...